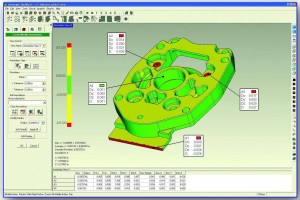
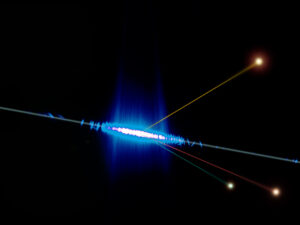
 Dimensional and shape testing techniques are rapidly evolving, also to meet the increasingly exacting market requirements of granting a high quality level of products. In particular, the so-called “portable measuring instruments”, which undoubtedly represent the last frontier of modern metrology, find growing applications and diffusion. Those instruments, thanks to the hardware and software evolution, allow acquiring and managing “clouds” consisting of dozen million points with state-of-the-art 64 bit notebooks and with costs, today, within the reach of small-medium companies, too; just few years ago much more expensive workstations would have been necessary. These systems perform a quite similar task to fixed Coordinate Measuring Machines’ (CMM), but they enjoy much higher transportability and use flexibility; they do not assure the same precisions but it is likely that the existing differences will be filled in some years. In several metrology sectors, on the contrary, portable systems have already ousted fixed CMM. Among portable instruments, we are here analysing “contactless” ones, that’s to say those that avoid “touching” the surface to be measured: they currently represent a more and more widespread solution for the dimension and shape control of the castings used in the foundry industry.
3D laser scanners
Those instruments are subdivided into two sub-categories: “time of flight” and “phase shift” laser scanners.
The first are based on a laser emitting diode and on a sensor that measures the round trip time of the electromagnetic pulse (laser beam) reflected by the object and draws the distance of the reflecting item, being the light speed known. Time of flight laser scanners are suitable for measuring ranges included between 1 and 6,000 metres (depending on the model). When equipped with a class 1 laser, they perform a +/- 4 ÷ 6 mm measuring error at about 100 m of distance and that error is directly proportional to the measured distance. Phase shift laser scanners are instead based on a laser emitting diode and a sensor that measures the phase difference between emitted and received wave. The phase shift technology has a lower measuring range than the time of flight technology (1-180 metres) but it is more precise, much faster and more expensive.
Laser scanners are therefore suitable for measuring medium-long distances; they are then apt for detecting galleries and pits, big architectonic structures, industrial plants, shipyards and all the ambits where the millimetric/centimetric measurement error is admissible. Being optical acquisition instruments, they can measure only what they “see”; it is then important to plan at best the survey to be performed in order to acquire correctly the zones “hidden” to the various detecting stations.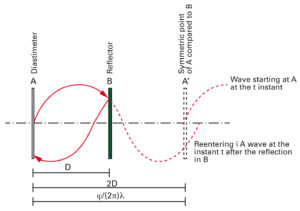
Laser trackers
Laser trackers are suitable instruments for measuring single points through the use of optical targets. They have much higher precision than Laser scanner systems (0.025 millimetres of error at several metres of distance). They are not generally used either in reverse engineering or shape testing ambits, nor they are suitable for detecting entire complex geometries; they are instead apt for the alignment of big machine tools, of plane wings in the assembly phase or of ship sections.
Structured fringe light instruments
They are instruments that exploit the fringe light projection, based on a light projector and two fixed cameras, placed on a tripod or on apposite robotic stations. That family of instruments provides the advantage of acquiring wide surfaces with submillimetric precision in very short times, but it has the disadvantage of being scarcely flexible, since the devices are fixed on a tripod and very expensive, especially in the configuration on robotic isle.
Hybrid instruments
They are very flexible instruments, being able to measure both in contact and in contactless modality. In virtue of this feature, they are the most widespread instruments. They are roughly classifiable into:
Anthropomorphic measuring arms, that’s to say articulated systems provided with as many encoders as the axes (up to 7) composing them;
instruments based on interpherometry laser trackers, based on a fixed station that follows infrared sensors positioned on the probe and are able to determine the position in continuous;
Optical tracking systems, based on a fixed station provided with two cameras that, detecting the infrared sensors positioned on the probe, determine the position in continuous according to the optical triangulation principle.The instruments based on the laser tracker or on the optical tracing have, in comparison with anthropomorphic arms, a wider operation volume, but their cost is much higher (from four to 10 times an anthropomorphic arm).
THE LAST BORN AT ATOS’ S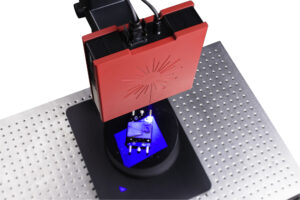
On the occasion of Control 2013 exhibition held in Stuttgart in May, Gom presented Atos Core, the new structured light detector that uses 3D optical sensors by Atos and the Triple Scan technology. Besides the stereoscopic measuring, the detector can use the two measuring cameras individually, like in presence of three distinct sensors. This technology assures better high-precision measuring of bright surfaces, higher acquisitions of complex components and at the same time a lower number of single scanning processes, thus simplifying the management of the whole procedure. Atos Core is equipped with Blue Light technology, the narrowband blue light that allows performing precise measurements irrespective of the environmental light conditions. It is available in different product lines targeted to 3D scanning for applications such as reverse engineering, rapid prototyping, metrology and automated analysis, also of small-size objects.


